Points of Interest
Points of Interests (POI) are the different items your venue's visitors will be searching for. Depending on the venue type, they could be for example shops, offices, platforms, or different attractions. Points of Interests are managed in the Wayfinding view.
Points of Interests are very easy to add. Just select the "Add Point" tool and click the place, where you want the POI to be at. Select, which category and subcategory the POI belongs to and give it a name.
If you need to adjust the POI, just use the select tool, click the POI and move it around or delete it.
Type
You can see that there is a wide selection of different Point types to select from. In standard navigation setup, you will be only needing points of interests, staircases, elevators and escalators. If you are doing indoor-outdoor navigation, you might need to add some entrances (read more in the tutorial on outdoor navigation). The rest of the types are specific to audio navigation and in specific for audio navigation to visually impaired users. You can read more about that on the chapter on audio navigation.
Categories & amenities
The Points of Interests added to your setup can be divided into multiple categories and subcategories, which are called amenities in the Proximi.io architecture. There are some default categories and amenities setup on the Proximi.io wayfinding editor. Those can be edited and new categories and amenities added through the Wayfinding editor. Click on "Settings" icon, and select "Manage categories and amenities".

If you have a small amount of amenities, you can keep them all under the same category. It's completely fine to keep all the amenities under the default category in that case. Multiple categories will become useful, if you want to build a complex hierarchy, for example add "Food and Beverage" as a category, and then "cafes", "bars", "fast food" etc as amenities.
For each subcategory, you can give a custom icon. You can manage those under "Settings" icon. Recommended con size is 128 x 128 pixels.
Tip: It's good to keep in mind that icons can be shown on different colour backgrounds, depending on the colour scheme you select for your project. Often an icon with a background colour is a good option.
Range
Range is the value in meters, how far from the exact location of the Point of Interest, you want to give the "You have arrived message". Often visitor does not have to be standing exactly at those coordinates to find the item, but it can be found a few meters away from the location. Defining 3 as the value means that the navigation will be considered as successfully ended 3m from the exact point of the location.

Icon-only vs text-only
Different ways of visualizing the Point of Interest
Adding media
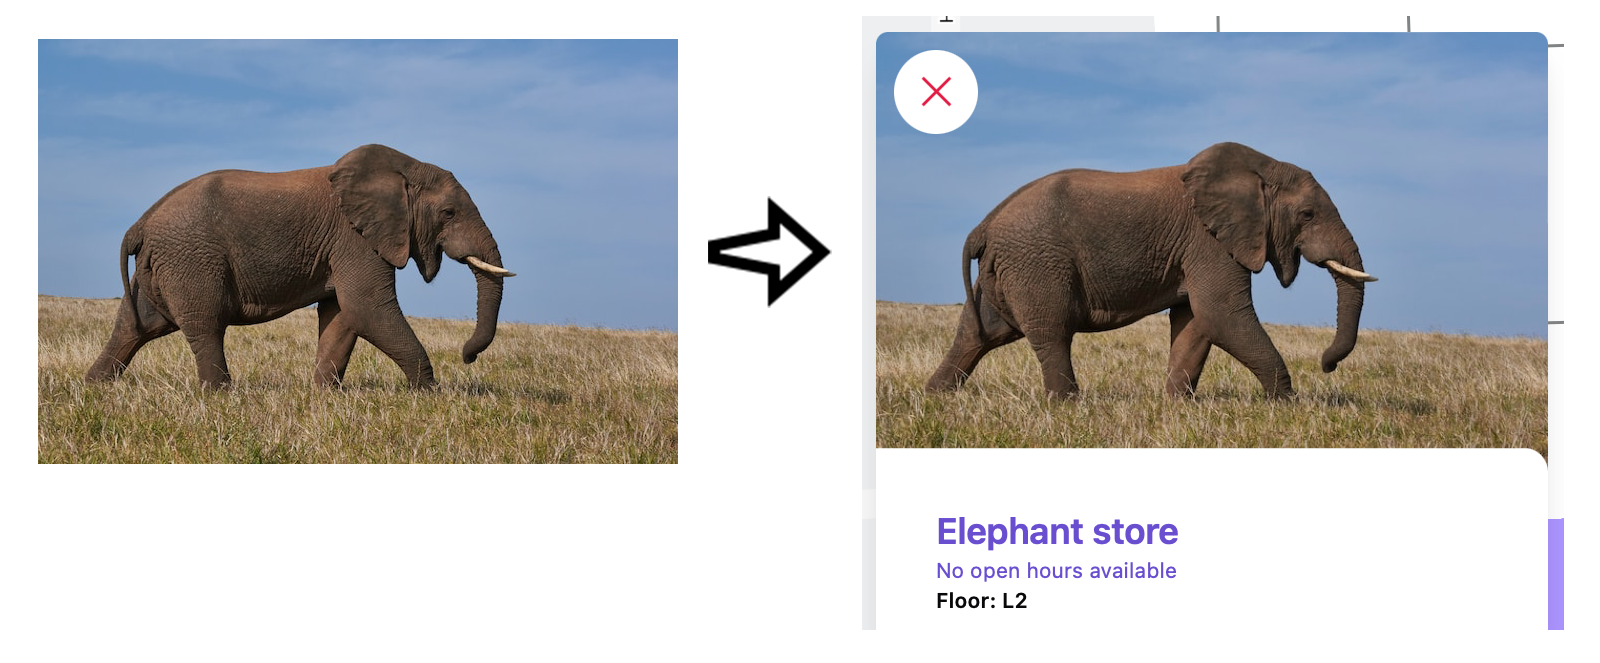
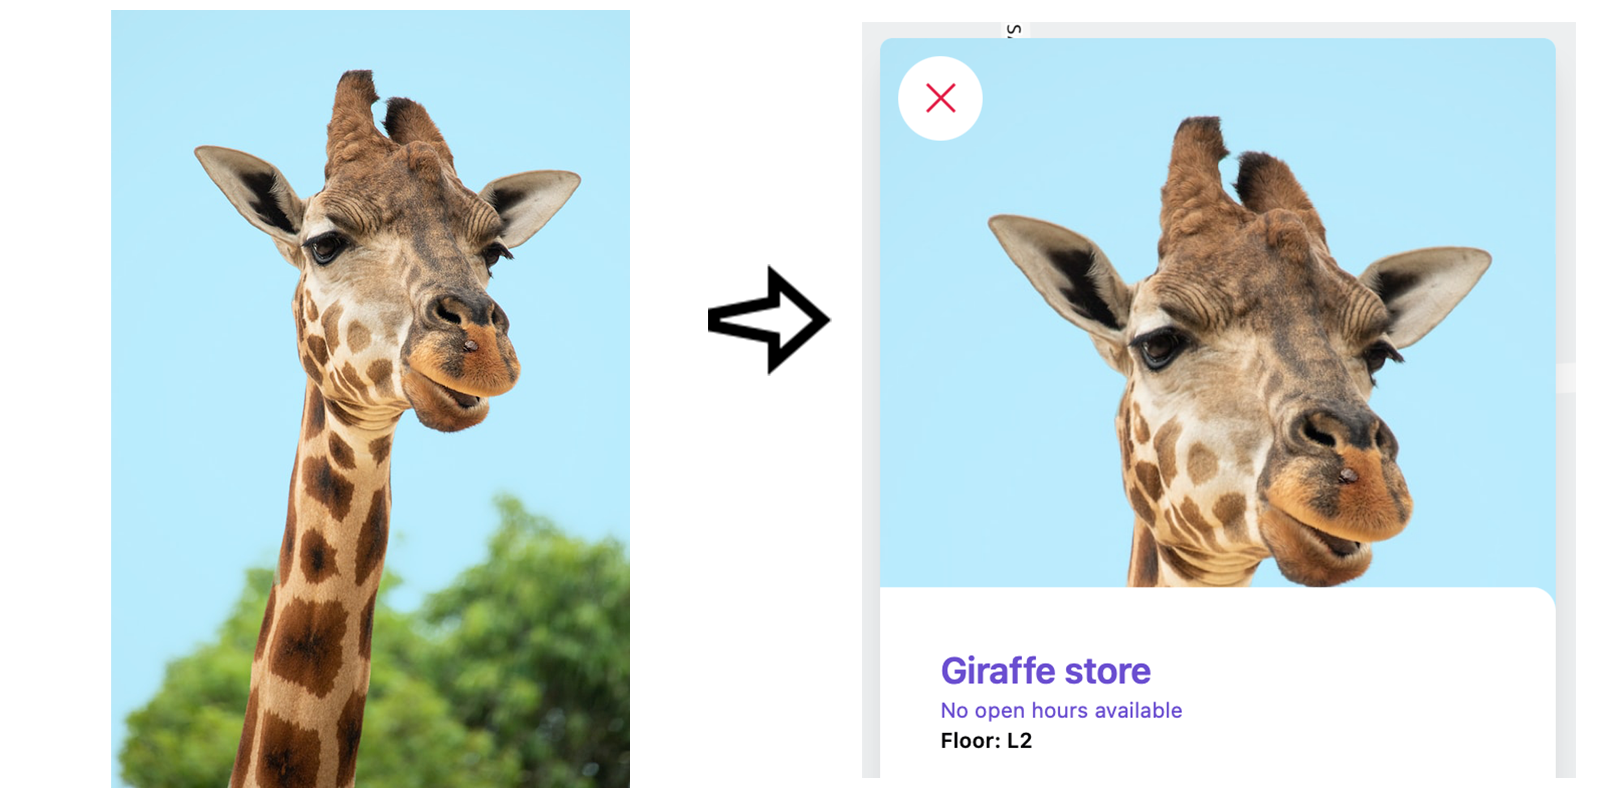
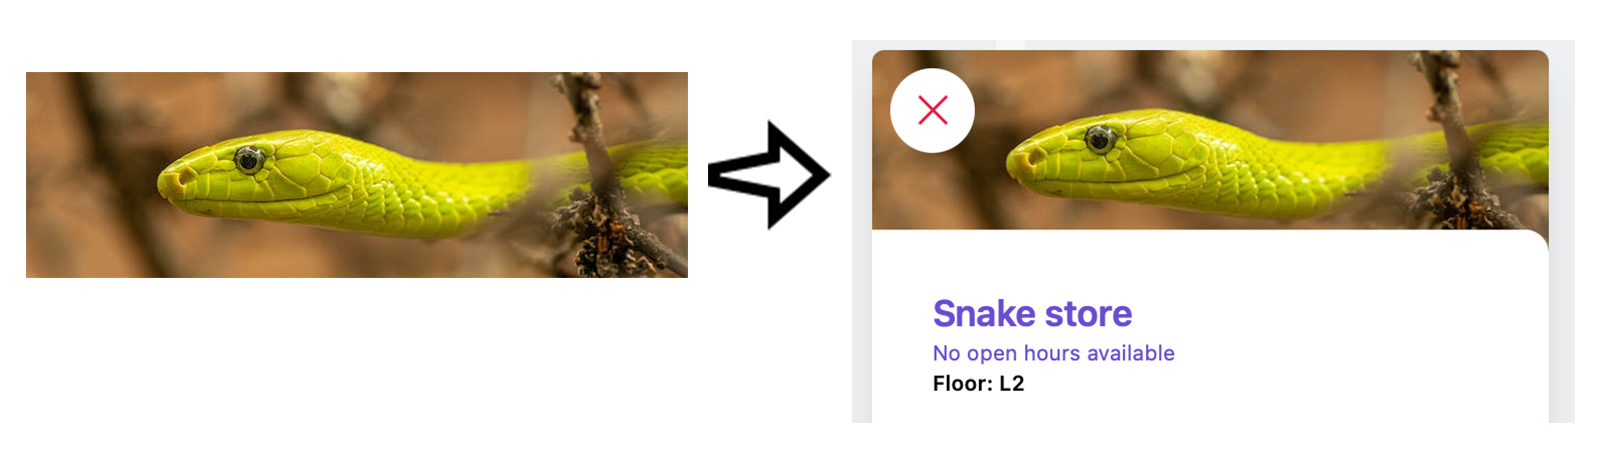
A picture works in both giving a better idea of what the POI has to offer, and in assisting the user in finding the location.
It is recommeneded to use a photo sized between 480p (480x800) to 720p (720x1280). The photo adjusts to the POI information pop-up automatically. The image width should always fit the parent element and height is cropped in case the final height is more than 384px. Examples:
Currently you can add multiple photos, but there is no way of deleting them or defining which one is the main one. This is coming, but for now the first photo added will be the main photo of the location.
General Metadata
Use for example for adding a description, defining opening times or adding any other information about the Point of Interest that you would like to show for example:
- on a POI detail page
- upon POI click
- use in search of filtering.
The text needs to be in JSON format. The format used in our sample application:
{
	"description": {
		"en": "We serve you every weekday, offering tasty food prepared by our own kitchen.",
		"fi": "Palvelemme sinua joka arkipäivä tarjoten maukasta, keittiömme itse valmistamaa ruokaa."
	},
	"openHours": {
		"0": {
			"en": "Closed",
			"fi": "Suljettu"
		},
		"1": {
			"en": "Open 7:45 – 14:30",
			"fi": "Avoinna 7:45 – 14:30"
		},
		"2": {
			"en": "Open 7:45 – 14:30",
			"fi": "Avoinna 7:45 – 14:30"
		},
		"3": {
			"en": "Open 7:45 – 14:30",
			"fi": "Avoinna 7:45 – 14:30"
		},
		"4": {
			"en": "Open 7:45 – 14:30",
			"fi": "Avoinna 7:45 – 14:30"
		},
		"5": {
			"en": "Open 7:45 – 14:00",
			"fi": "Avoinna 7:45 – 14:00"
		},
		"6": {
			"en": "Closed",
			"fi": "Suljettu"
		}
	},
	"link": {
		"title": {
			"en": "Check the menu here",
			"fi": "Katso ruokalista"
		},
		"url": "https://www.antell.fi/round/"
	}
}
Day 0 refers to Sunday. The day is automatically picked by the application. The result looks like this:

Wayfinding metadata
What information you want to give to users, when they are navigating through or arriving to a POI. This functionality typically links to audio navigation, and is explained fully under section on audio navigation.
Connecting POIs to your own database
Best practices: add through your own system, manually adjust on Proximi.io portal.
It is recommended to do the linking between a 3rd party system and Proximi.io solution through IDs, not names. Add your IDs under metadata, for example with key "remoteId".
For OfficeRnD integrations, use key "officerndId".
Exporting the information of POIs
All the information of POIs can be exported by selecting "Settings" button and "Data". Select the language you want the POIs to be exported in and press "CSV Export". Excel file will be downloaded to your computer
