Importing Estimote beacons
If you haven’t ordered any Estimote beacons yet, you can do that by contacting Estimote: https://estimote.com/. Proximi.io supports all the Proximity Beacon and Location beacon models from Estimote.
We also recommend you to check out the previous articles in this tutorial series to get all the basic things done before importing any beacons.
- 1
-
Create an Estimote account.
You can create your free Estimote account from the following url: https://cloud.estimote.com/. Click on Sign up below the login form. Once you’re redirected to a new page, fill in the form by providing your email, and setting up your password. Double check your data to make sure you’ve got the right email and hit the Create account button. Check your inbox and click on the activation link - your account is created!
- 2
-
Add beacons to your Estimote account
Your beacons should be automatically visible under the "Beacons" view. If not, contact Estimote for support - 3
-
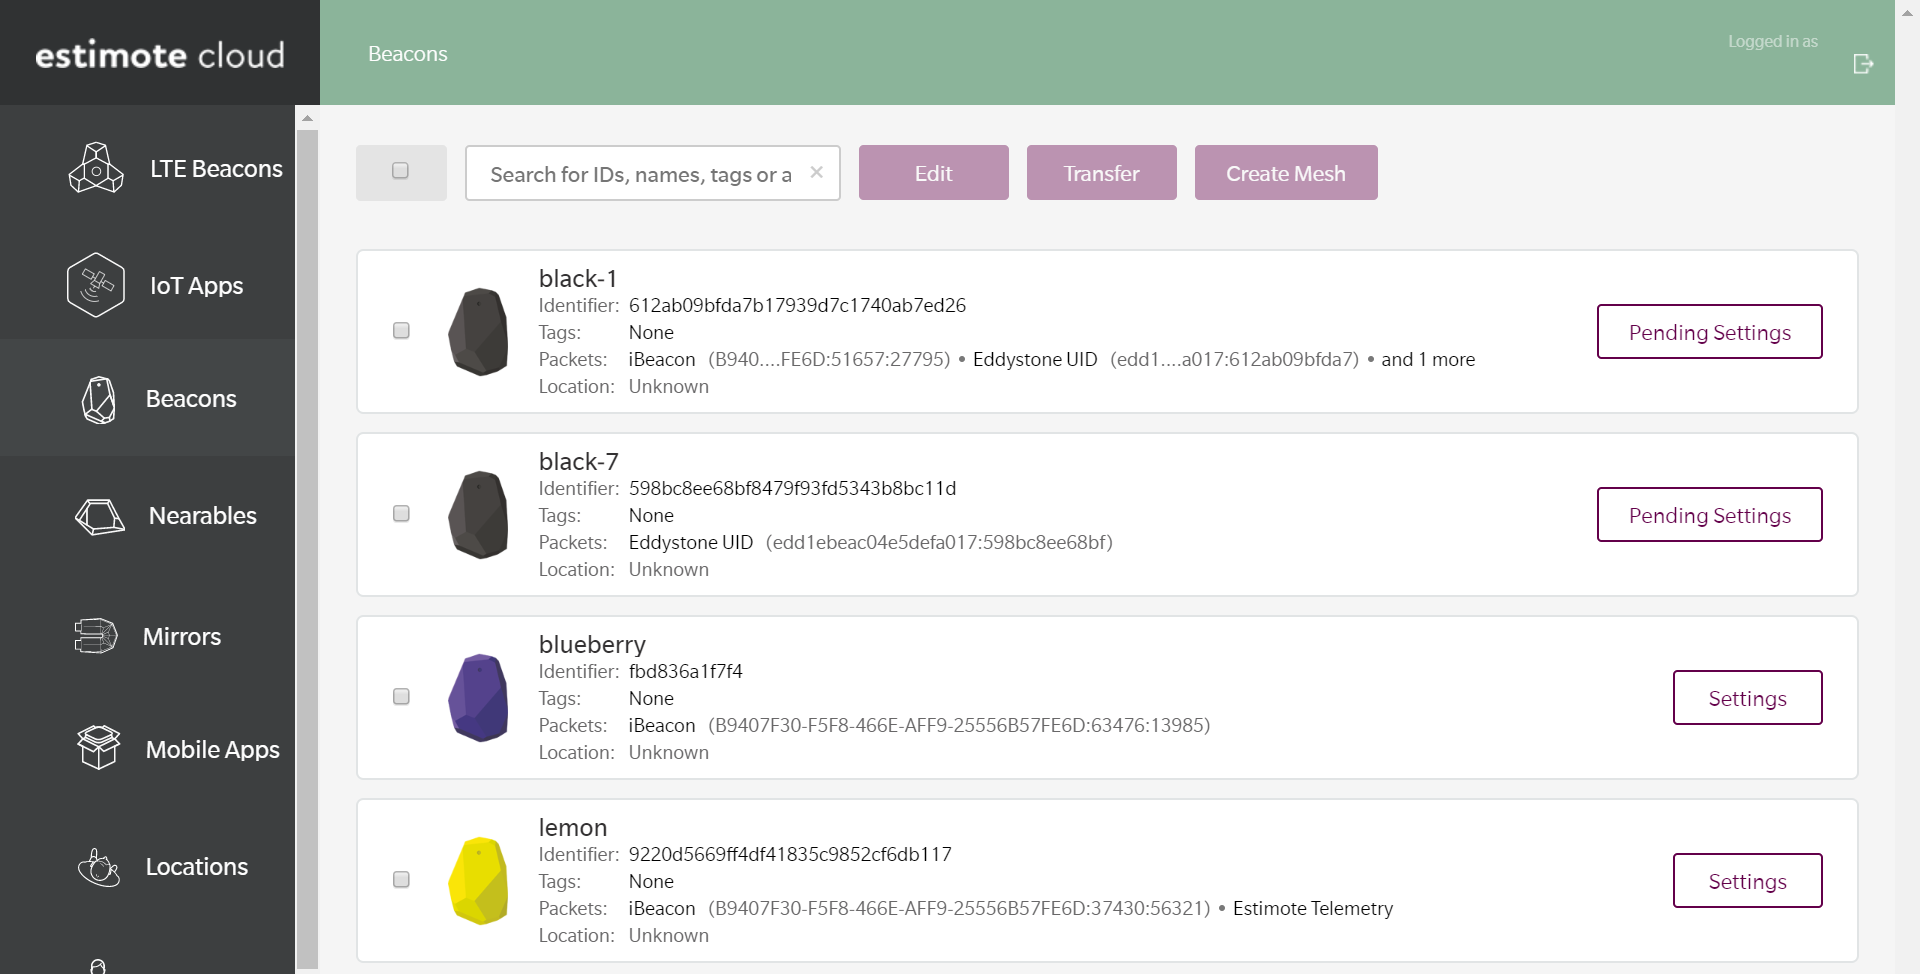
Inspect the results in Estimote portal

- As your beacons arrive, they already have some pre-configured settings. In the Estimote portal you can see what those settings are, change their broadcasting values etc. When you change any of the settings at the Estimote web portal, remember to synchronize the setting to your beacons via the Estimote mobile management app (you need to be nearby the beacons).
- 4
-
Obtain the Estimote App Id and Token
You need the Estimote App ID and App Token to perform the import. You can obtain these values from your Estimote web portal, select “Mobile Apps” from the left panel and then under “Your Apps” generate a new application (if necessary) and click Show details. Copy the App ID and App Token to your clipboard.
- 5
-
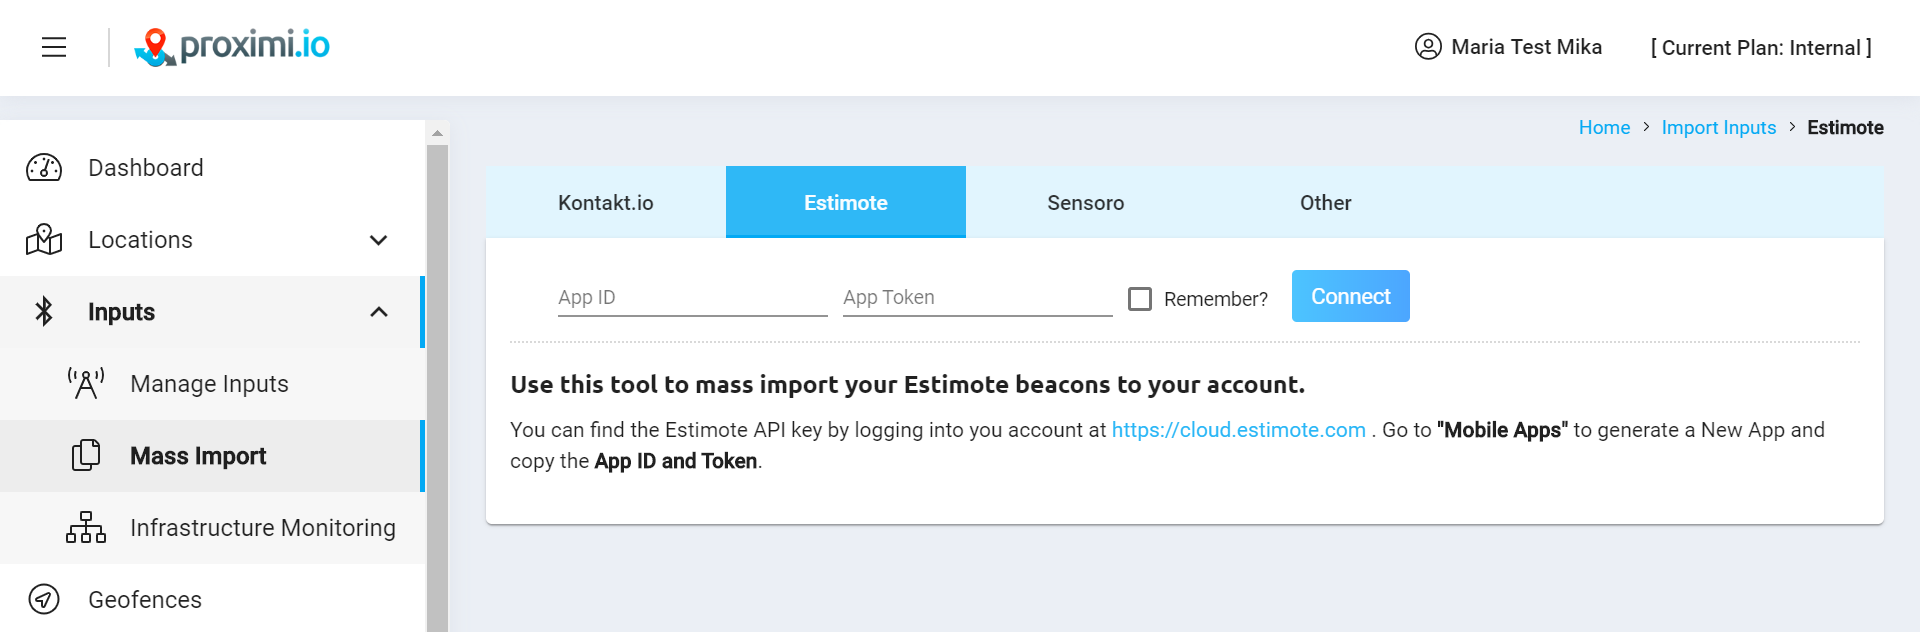
Import beacons to Proximi.io portal
Login to the Proximi.io Web Portal and head down to the Manage Inputs -> Mass import section. Paste your Estimote App ID and App token to the correct fields and click “Connect”. Tick "Remember" box, if you want the portal to store the keys for future imports. You can later disconnect the integration through the same view, if needed.
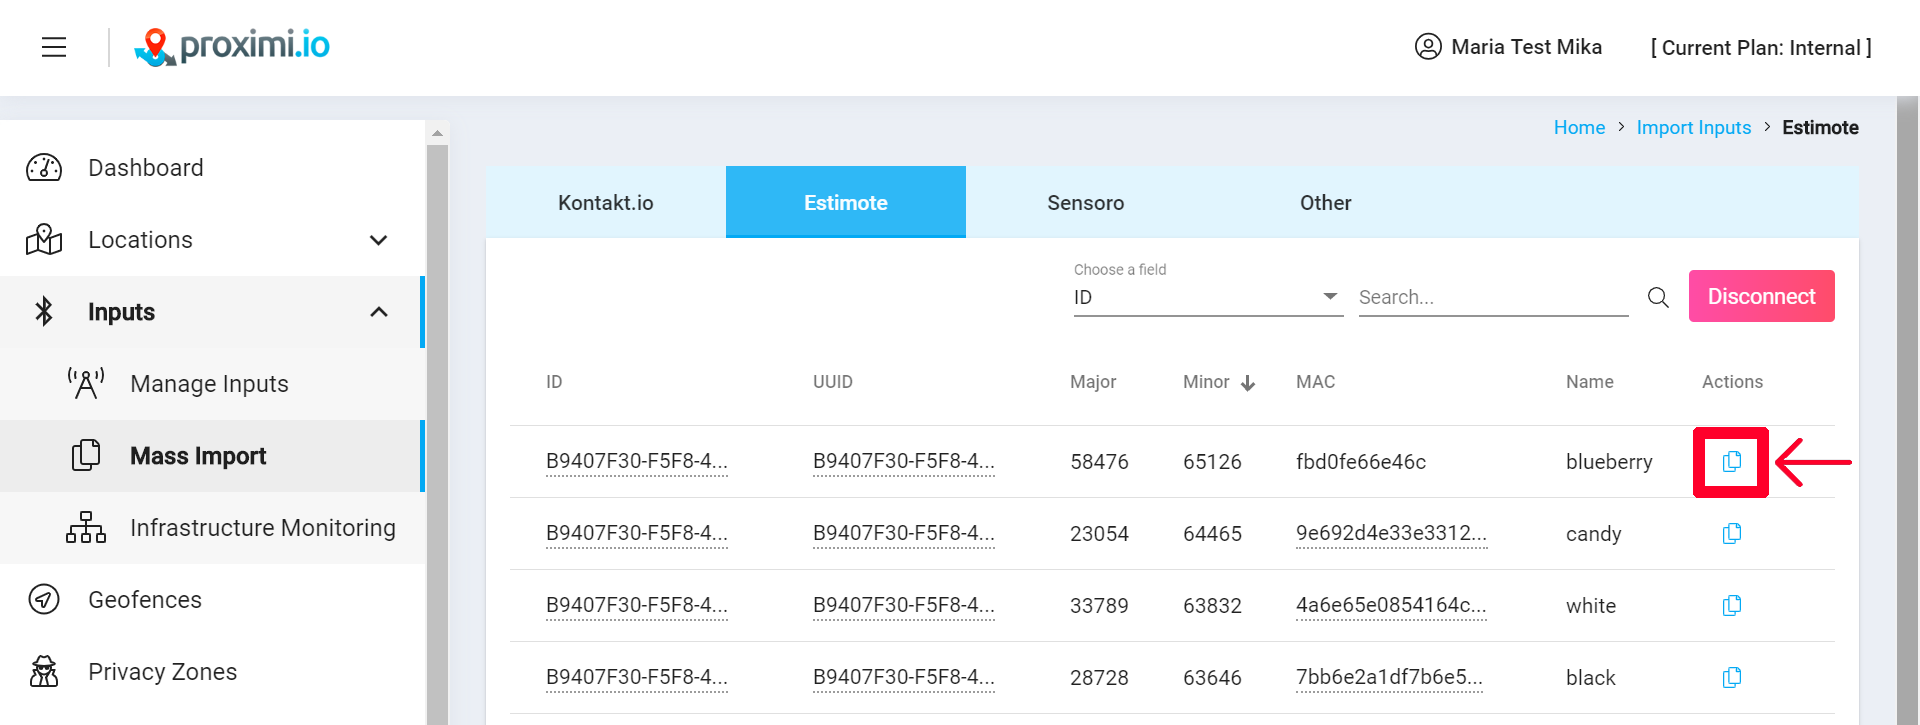
Next step is to import the beacons one by one by clicking “Import” link at the right side of the table.

- 6
-
Place beacons to the correct location
Select the right department and move on the beacon on the map to the correct location.
 After pressing Submit, you will return to the view that allows you to import more beacons. Please note that the view shows all the beacons you have on your Estimote account - including the ones you have already imported.