Creating raster map artwork
This tutorial explains how to create artwork that works as an illustrated map with the Proximi.io platform. Some of our customers have already owned artwork that works for this purpose straight out-of-box. Here is the criteria fro checking, if you have existing artwork that could fit:
- Drawn to a scale. It is not important what the scale is, as long as one meter on the real world is always the same amount of pixels in your artwork.
- Covers the whole area of your park. If your artwork consists of multiple separate pieces, please stitch them together before sending to us.
- Is either in vector format (Illustrator / .ai or PDF) or a very large-scale raster file. By large scale we mean around 10 000 x 10 000 pixels minimum, depending a bit on your area size. The map should look good, when zoomed in.
- Maximum size 30 000 x 30 000 pixels.
- No Point of Interest markers (little circles etc), as these will come from the Proximi.io platform
- No text or very little text
- No map key
- No extra borders. If your area is not a square, please add a background layer to your artwork, and colour it with a colour nor used anywhere else in the artwork. That way we can automatically erase it.
If you come to the conclusion that you don't have the right kind of artwork, you can either purchase the creation of a map through Proximi.io, or create one yourself. Here are the instructions to that:
The most important thing of the artwork creation process is to ensure that the artwork will align with the real-world coordinates as perfectly as possible. This ensures that projects that utilize GPS will be visualizing the user's current location correctly.
Steps:
1. Select which area you want to cover with the raster map. Note that the raster artwork does not need to cover all the area that will be visible in the application. Usually projects visualize standard Open Street Maps map in the background for the rest of the area. Example:
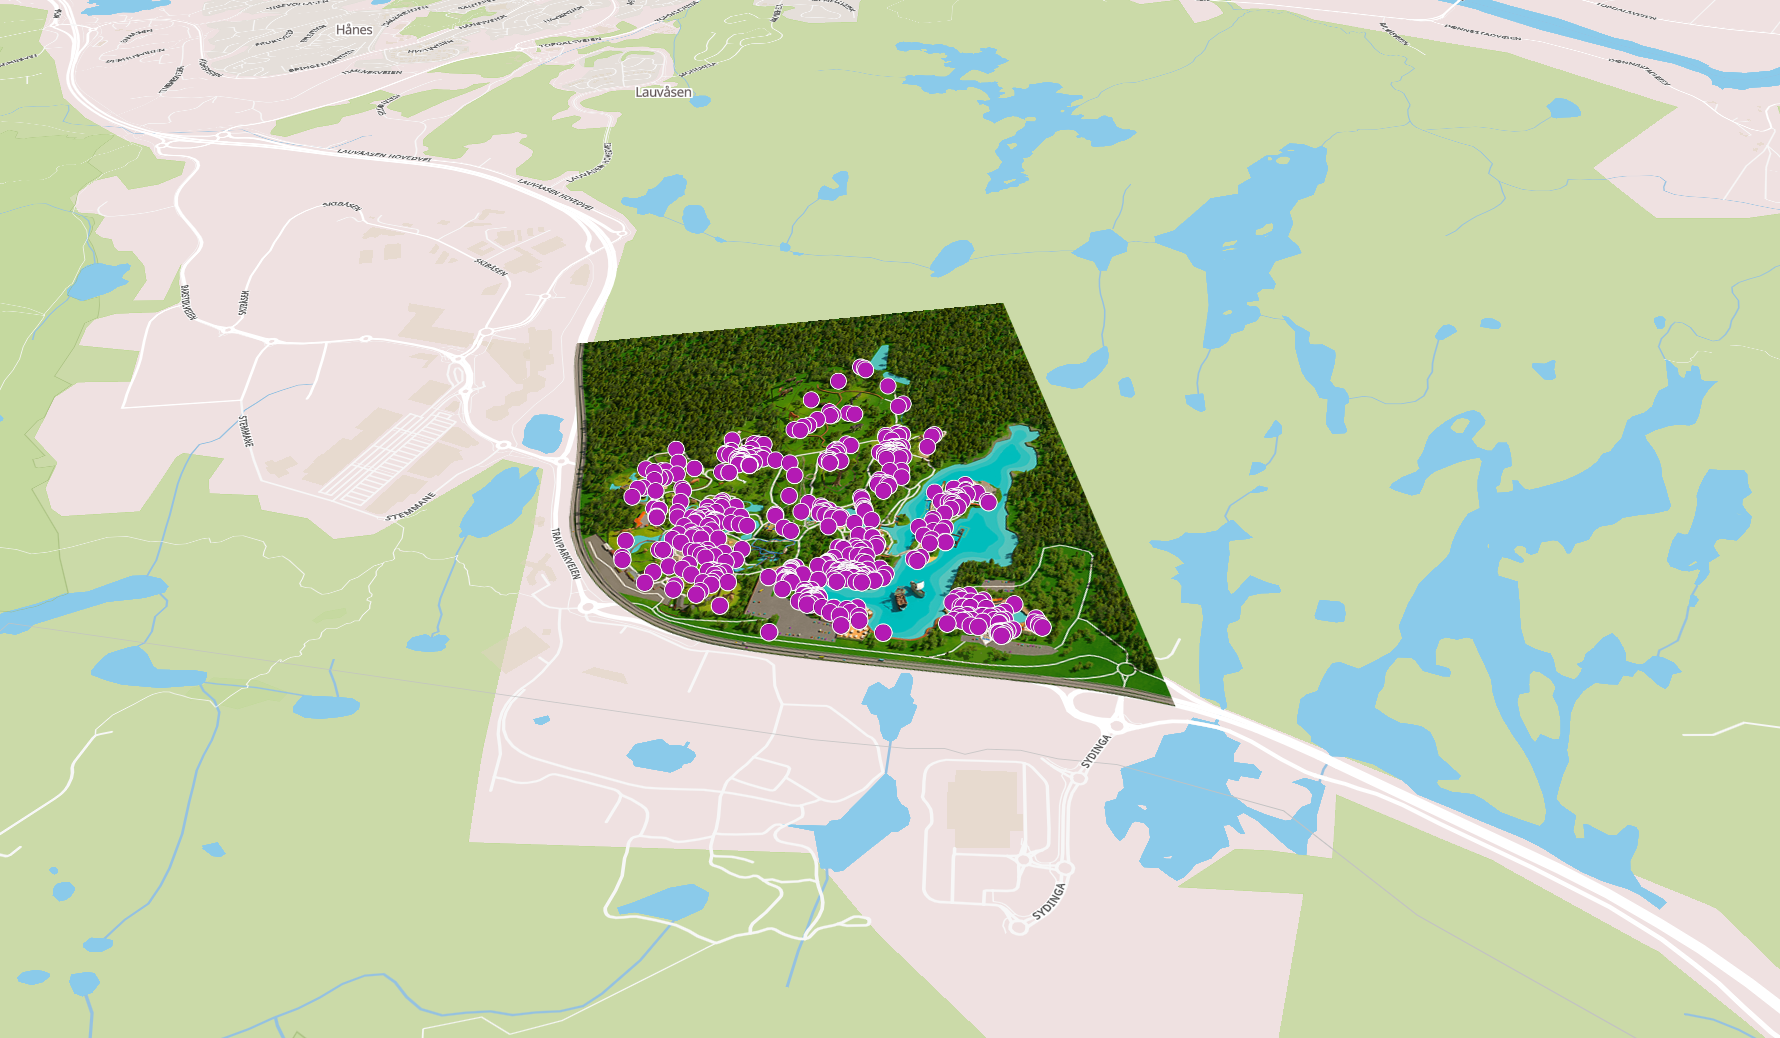
If your venue is on an island or has a fence running around it, use that as the natural border of your artwork. Otherwise you just need to draw the line where it feels most natural. The example picture is using the road on one side of the park as the boundary.
2. Go to address https://www.openstreetmap.org/ and zoom into the location of your venue. Click share on the right-hand menu.

3. Enable "Set custom dimensions" and select the area that you want to cover with raster map artwork. Change the format to SVG and put the scale as large as possible (= i.e. the number after 1: should be as small as possible). Try writing in 1 : 1000, and the scale will adjust automatically to the smallest possible. Download the map.

4. Open Adobe Illustrator and create a new file with this map as the base layer of your project. The size of your artwork should be somewhere from 10 000 x 10 000 pixels to 30 000 x 30 000 pixels. If your area is very small, a smaller size artwork also works. You can add in additional layers, such as satellite images, old maps etc. The OSM map is the base truth information that should be used for aligning the additional layers.
5. Start creating the artwork on separate layer/layers. If you have pre-existing maps with the right kind of artwork, but that are not geographically correct, you can separate the illustrations of the attractions as separate layers and move them around to their correct locations. Photographs of the artwork can also be a great help, if you are creating artwork from a scratch.
Note about perspective
You can select, if you want to visualize the venue directly from the top ( top-down perspective), or to create a partly isometric map.
If you are utilizing top-down perspective, you can simply sketch the buildings, pathways and other details from the underlying OSM map. You can add in details as preferred, e.g. bring in some texture for buildings or add in tree leaves.
In partly isometric maps, you draw the roads, pathways, water elements and location of buildings and attractions based on the OSM data. But for selected buildings and attractions, you can draw them from an isometric perspective. You can also exaggerate the size of some details, if it feels fit. The selected perspective needs to be the same for the entire venue. Some examples:

If your artwork feels a bit empty, you can for example add in more texture with trees or exaggerate the size of some attractions to create a good balance.
What you should not add are:
- Point of Interest markers, as these will come from the Proximi.io platform
- Lots of text. If you want to display any text on your map, select it very carefully. It is also possible to add text labels through the Proximi.io platform
It is important to keep in mind that Open Street Maps is a community-driven project. The maps are generated by volunteers, utilizing Open Source satellite imagery. Some of the satellite imagery available is not very detailed or is taken from a perspective. Sometimes the satellite imagery may be old. That makes it difficult for map digitizers to get all the details at exactly the right location, even when the maps are always double-checked by another digitizer.
Thus, you can typically trust that the larger elements, such as roads, lakes and parking spots are correct, but smaller details might not be 100% right. If you see discrepancies between the OSM map and what you can see in your other materials or with your own eyes, when visiting the site, do go ahead with those corrections in your artwork.
It is recommended that the final artwork is checked by someone who is very familiar with the area.
6. If your area is not a square, add in a background layer that uses a colour not used anywhere else in the artwork. That way we can automatically delete the background in the tile creation process. Do not leave the background transparent.
7. Once you are finished, send the .ai file to Proximi.io team. Please leave the original OSM map image as a part of the project. We will use some of the prominent landmarks as fixed points to align the map correctly again on top of the real world map. We will convert the artwork into raster map tiles, and onboard them under your account.